 Create your own 3D model on your Smartphone!
 Create your own 3D model on your Smartphone!
The Museum has lots of online 3D Models that are available to view in VR and AR. You can check out one of our previous tutorials for an AR Wallace Fountain here.
Many museums are making their collections available online as 3D models as a means of preservation, and opening up the collection to new audiences.
We would love to see some of the interesting objects that you have around the house – this could be something that tells a family story or holds a special meaning. These can also be everyday items, or something that we might take for granted – who knows, in years to come they may be held in a museum!!
Step One:
Download a 3D Scanning APP, find one that works best for you trough the link.
For this tutorial we will be using SCANN3D for android. Many off these apps are free to use and available on Android or IOS, for smartphone and tablet.
Step Two:
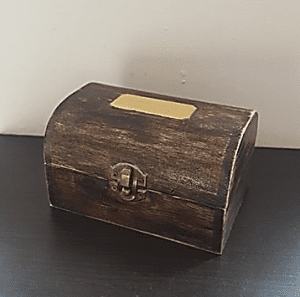
Choose your object. A small to medium size object will work best. Something that inst transparent and has a good surface texture will be more successful.
For this tutorial I used a small wooden box.
Step Three:
Set up your photo station. Make sure you have enough room to scan your object, a table or space that you can walk the whole way around would be ideal. Ensure your space is clear and move any other objects out of the way that could also get scanned accidentally.
Step Four:
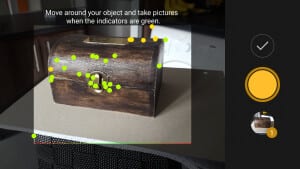
Start to scan, depending on the app it might ask you to take a 360 video around our object or take several images (usually at least 20) the whole way around. When doing this make sure to capture some of the same area that was in the previous image (do this the whole way around), the app will usually guide you on what makes a good photo.
Select create a new model, it will then bring up the camera screen where you can begin to take the pictures of your object.

Top Tips for Scanning:
- Make sure to keep a steady hand and try to take the pictures the same distance away, the whole way around.
- The scan will work best if each image includes at least 70-90% of the same area from the previous picture.
- Things that move or have a shiny surface do not make for great models.
- Don’t try to light up the object, natural lighting works best, but try to avoid dark shadows, the perfect lighting is outside on a cloudy day.
Step Five:
View and edit your Model.
3D scanning can be tricky to master but with practice you can have your own 3D digital object, that you can print, edit and share with your friends.

We would love to see what you create, be sure to share your models with us!
Uploading to Sketch Fab
Many of the apps allow you to upload onto programs such as SketchFab where you can share your objects and view them in AR!
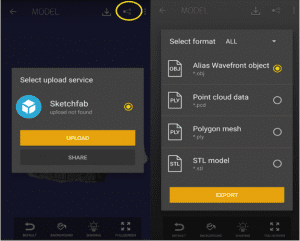
Once you have created your model, you can directly upload it to SketchFab using the share button in the top right corner of the app.
If the app does not have a direct share button simply save it onto your device, then upload it through the SketchFab App. Sketch Fab accepts a variety of file types but OBJ is one of the most recommended.
You will need a Sketch Fab account but don’t worry they are free to set up and can connect through Social Media for quick sign in.
Once you have logged into your account the model should directly upload to your profile. Go to your profile where you can save all of your models and share them or view them in AR, it’s that easy!

We would love to see you explore and share your AR experiences with us give it a try and tag us in your photos on social media! You can view the Museum’s 3d objects here.